Manage users and credentials in your Keycloak
What you will get: a user for each person of your organisation, with the credential it needs, ready to be loaded in a wallet.
This guide is for organisations that joined without deploying a connector (option A in Join the data space). The portal created a realm of your own in its Keycloak, and you manage it. If you run your own connector, see Create the users instead.
What you need
- The approval email of the onboarding portal. It arrives when the data space operator approves your registration.
- The address you gave in the form, to verify it the first time you sign in.
Steps
1. Read the approval email
The email contains everything you need in one place:
- The username (
admin) and a temporary password for the administrator of your realm. - Manage users & groups: opens the admin console of your realm.
- Step-by-step guide: this page.
- See more information: the status of your registration in the onboarding portal.
The console of your realm is at https://keycloak-onboarding.citcom-vrain-dataspace.eu/admin/<your realm>/console/. Your realm is the last part of your DID: for did:web:onboarding.citcom-vrain-dataspace.eu:my-city-a1b2c3, it is my-city-a1b2c3.
2. Sign in and change the password
- Click Manage users & groups and sign in with
adminand the temporary password. - Keycloak asks you to set a new password. Choose one and keep it: the temporary one stops working.
- Keycloak also asks you to verify your email. Open the message it sends to the address of the form and follow its link.
Warning
The admin user manages the users of your organisation. Keep its password safe and do not share it. Create a separate user for each person.
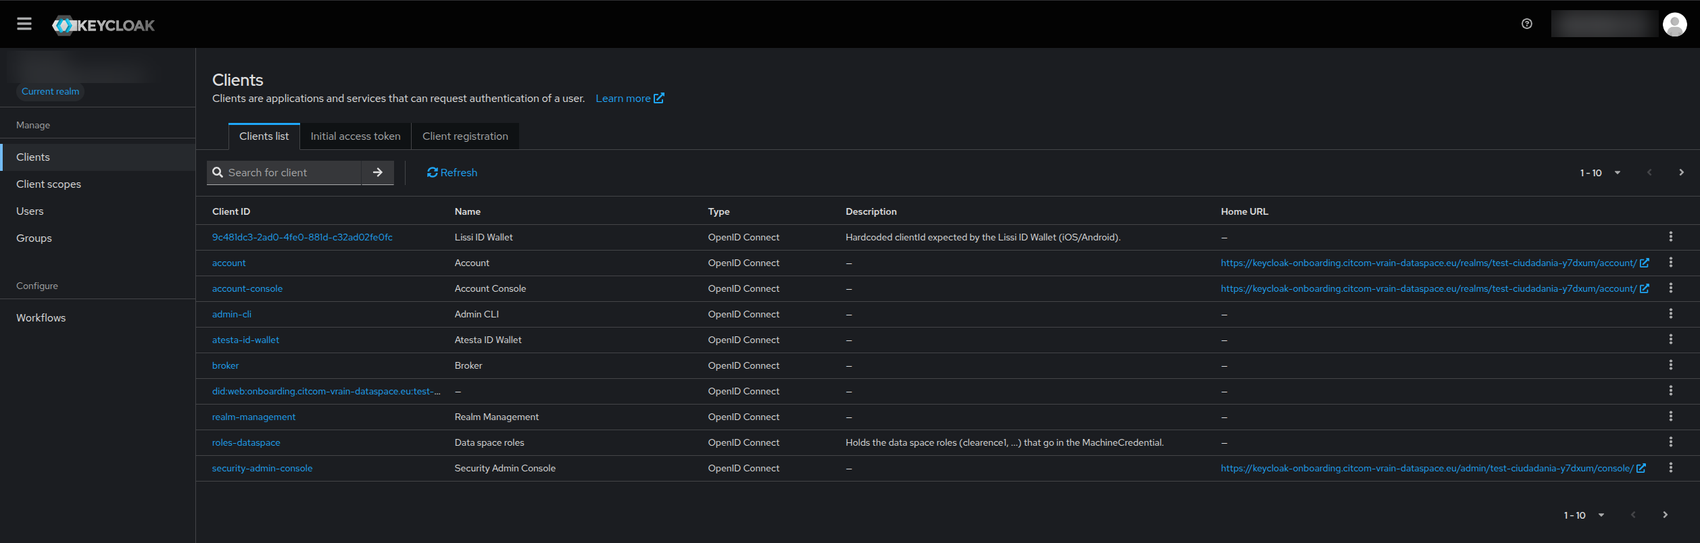
The realm has the sections Clients, Client scopes, Users and Groups. You will mostly use Users and Groups.
3. Create a user
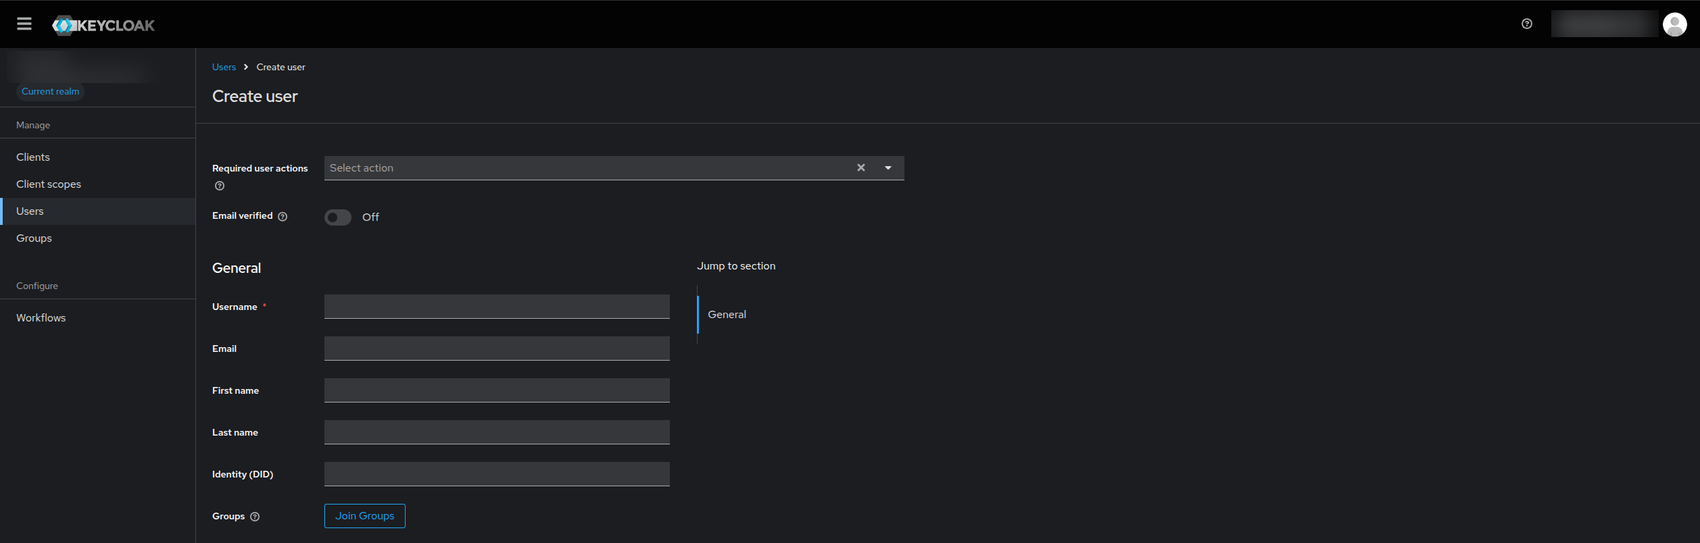
- Open Users and click Create new user.
- Fill in the username, email, first name and last name. The person receives its credential with these data.
- Leave Identity (DID) empty unless the person has a DID of its own.
- Click Create.
- Open the Credentials tab of the user and set a password.
Tip
The legal representative (LEAR) is the first user to create: it is the one that logs in to the marketplace and buys offers.
4. Check the group and the role
Every new user of the realm joins the group representative. That group gives the role REPRESENTATIVE, which lets the user log in to the marketplace and request offers.
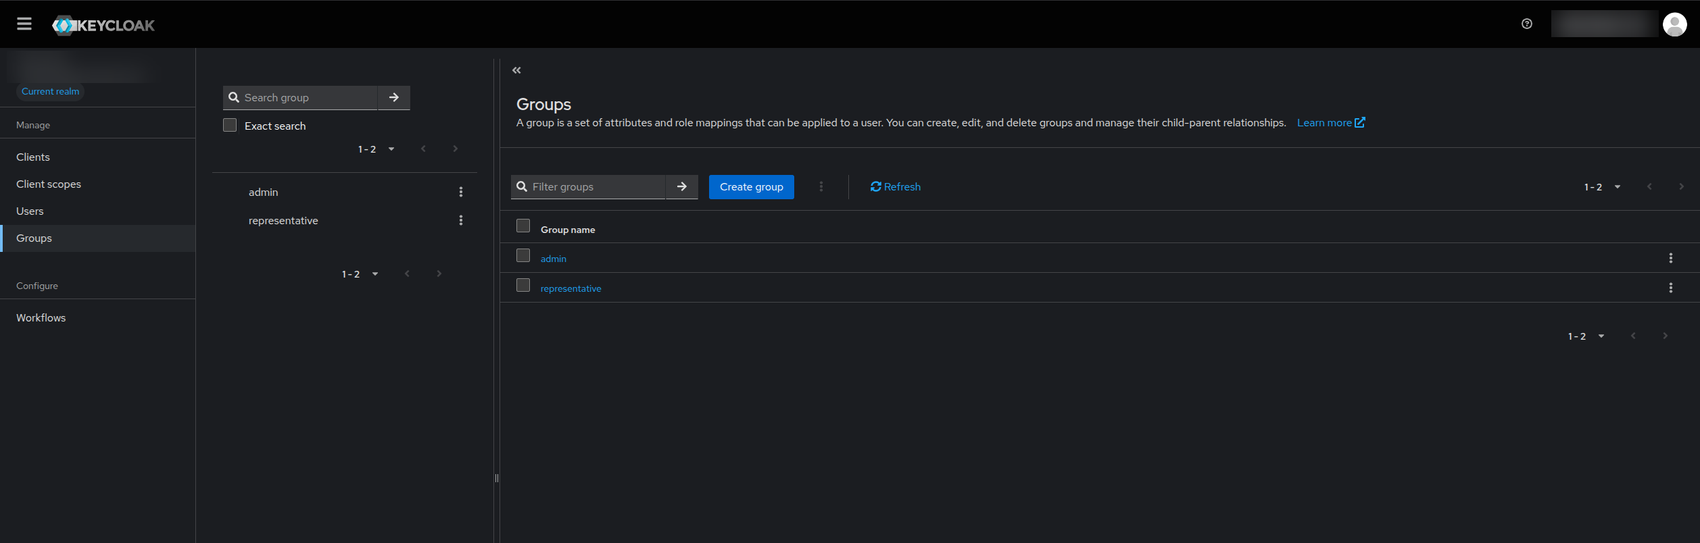
- Open Groups. Your realm has two:
admin, for the people who manage the realm, andrepresentative. - Open the user, go to Groups and check that it belongs to
representative. If it does not, click Join Group.
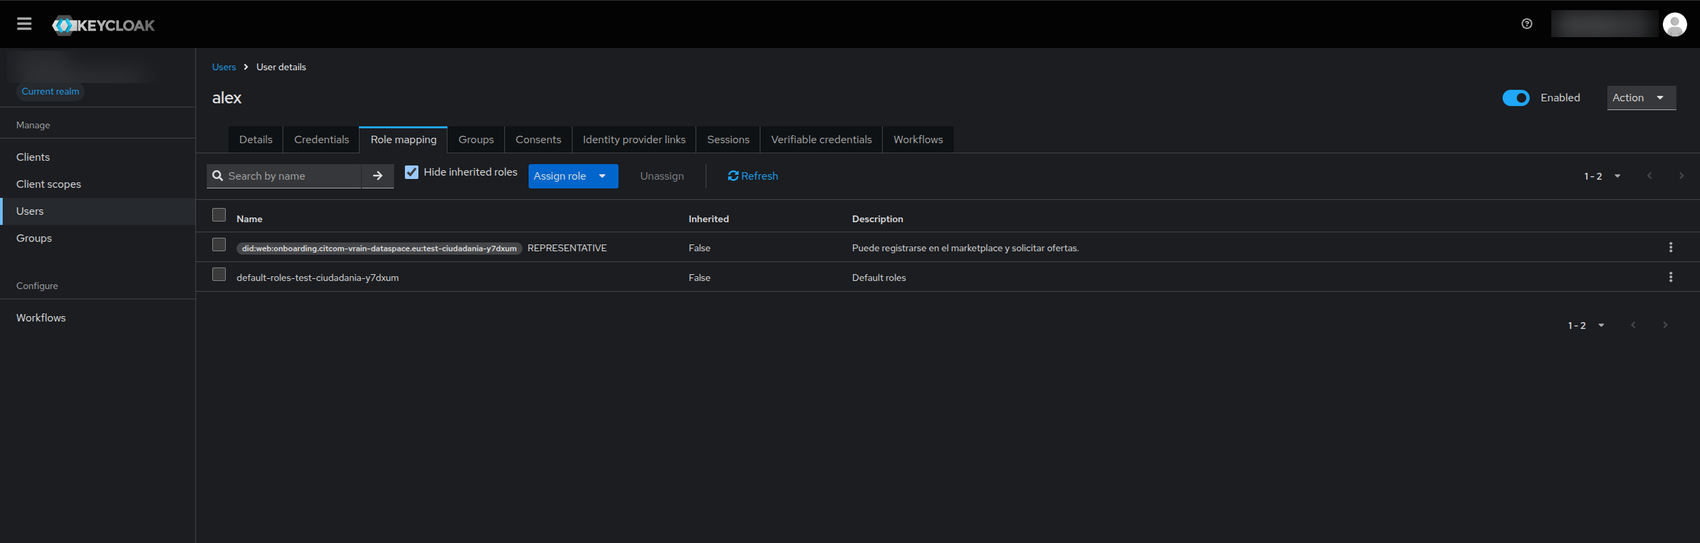
- Go to the Role mapping tab. You should see the role
REPRESENTATIVEof your DID, next to the default roles of the realm.
Give the group admin only to the people who must create and manage users.
5. Check the credential of the user
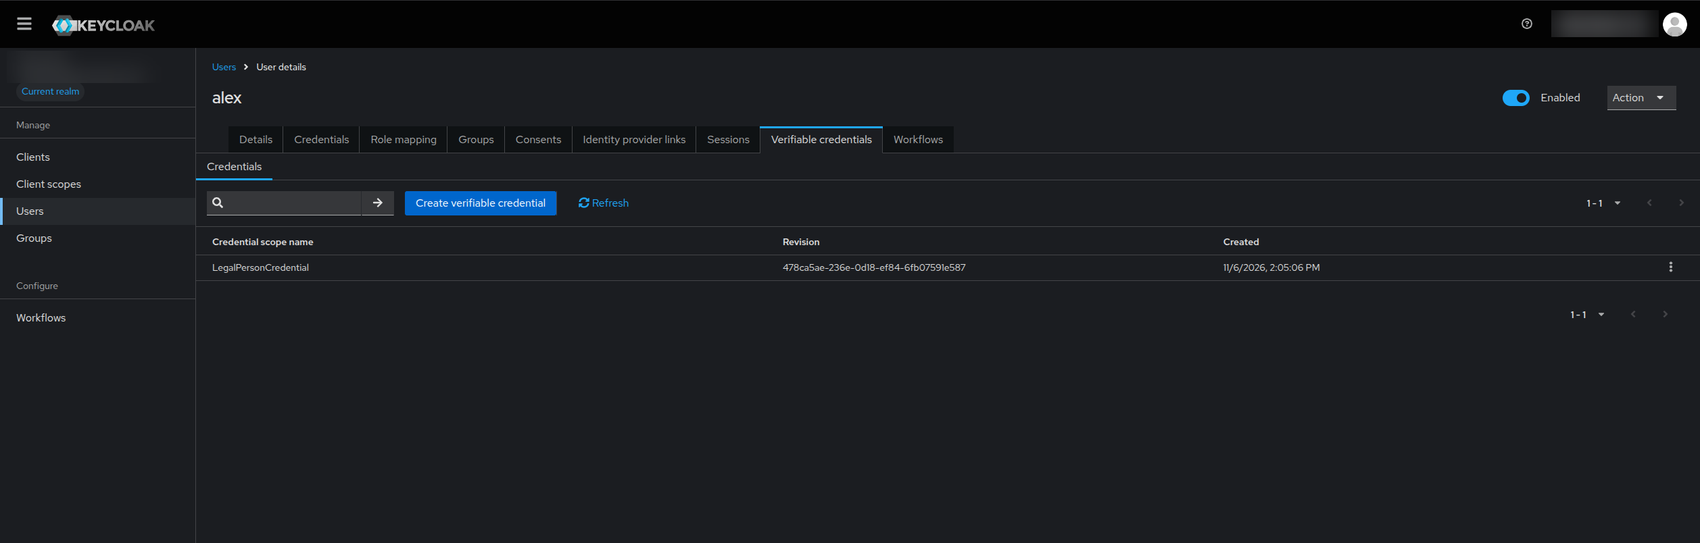
Joining the group representative gives the user the role, but not the credential: Keycloak only issues a credential that is bound to the user, and only the admin user of the realm comes with it already. For every user you create, open the Verifiable credentials tab, click Create verifiable credential and choose LegalPersonCredential. Afterwards it appears in the list.
6. Open the account of the user: impersonate
The credential is loaded from the account console of the user. You can open it without knowing the password of the user:
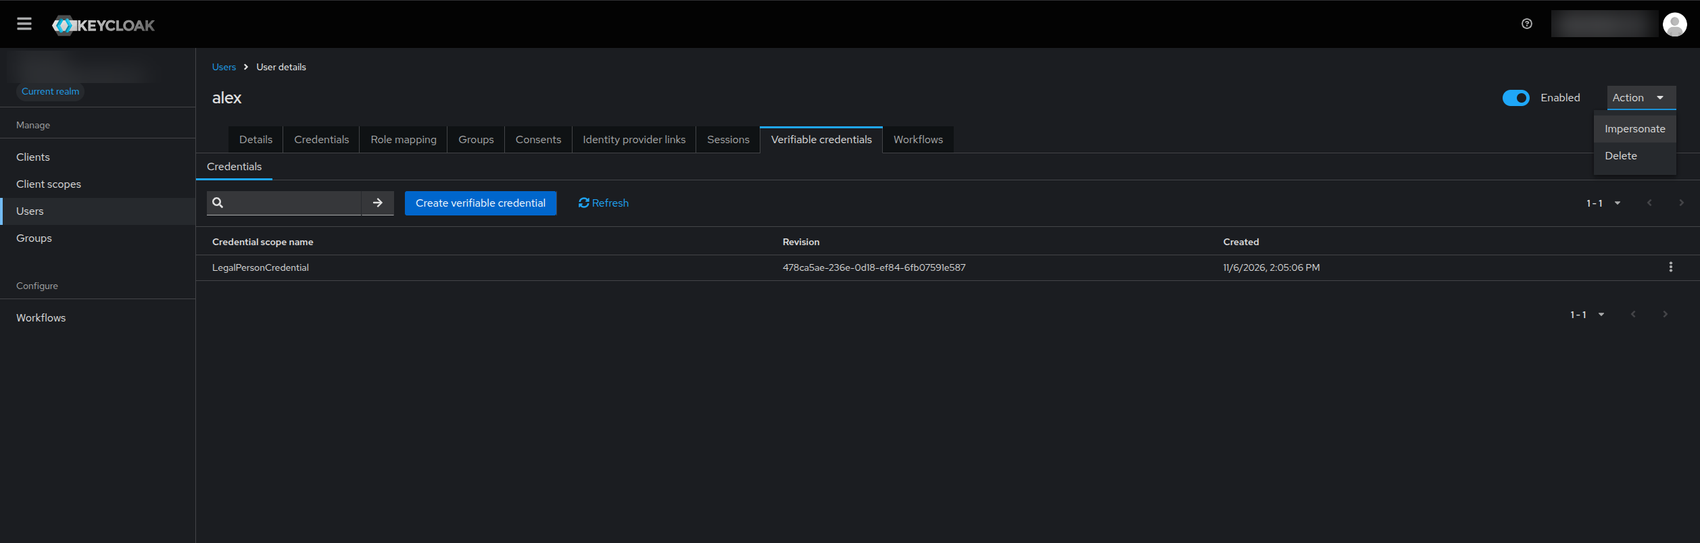
- In the user page, open the Action menu (top right).
- Click Impersonate.
- Keycloak opens the account console of that user in a new tab.
Note
Impersonate acts as the user, so use it only to hand over the credential. The person can also sign in itself at https://keycloak-onboarding.citcom-vrain-dataspace.eu/realms/<your realm>/account with its own password.
7. Issue the credential to a wallet
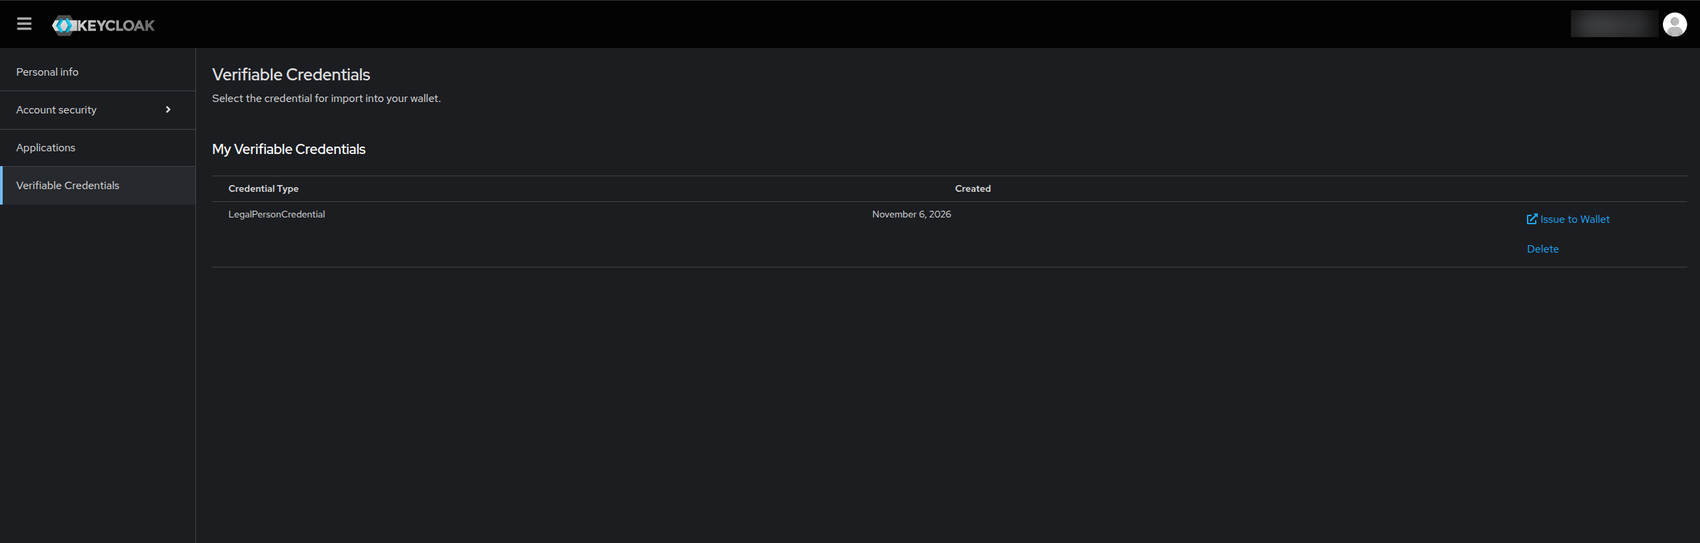
- In the account console, open Verifiable Credentials.
- Click Issue to Wallet next to the
LegalPersonCredential.
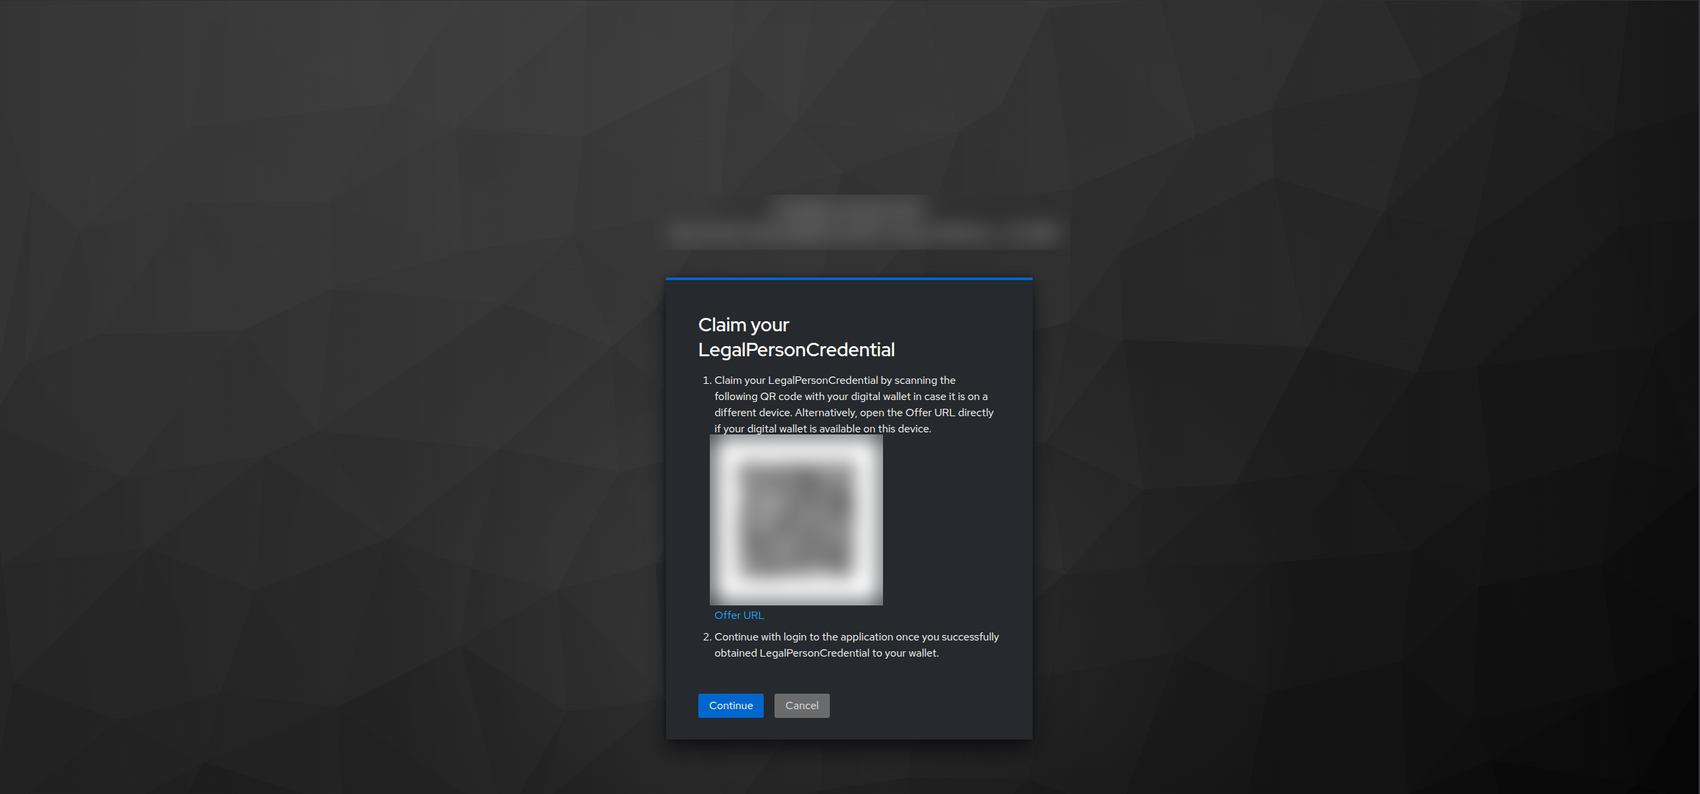
- Keycloak shows Claim your LegalPersonCredential: a QR code and an Offer URL. Scan the code with the wallet, or open the Offer URL on the device that has it.
- Accept the credential in the wallet, then press Continue in the browser.
Offers are short-lived. If the wallet rejects it, go back and click Issue to Wallet again.
8. Save it in your wallet
Follow Get a wallet and your credentials to install atesta-id-wallet or Lissi, accept the offer and log in to the marketplace with it.
Check that it works
- You can sign in to the console of your realm with the new password.
- Each person has a user with the role
REPRESENTATIVEand aLegalPersonCredential. - The wallet of the legal representative shows the credential, and the marketplace accepts its login.
If something fails
| Symptom | Cause | Fix |
|---|---|---|
| The temporary password is rejected | You already changed it, or the email of another registration was used | Use the password you set. If you lost it, contact the operator through the portal |
| No approval email | The message went to spam, or the address in the form is wrong | Check the spam folder; otherwise contact the operator through the portal |
| The console says the page is not available for your realm | The address has a wrong realm name | Copy the link from the email, or take the realm from your DID |
| The Verifiable credentials tab is empty | The credential has not been created for the user yet | Click Create verifiable credential and choose LegalPersonCredential |
| You have no verifiable credentials yet in the account console | Same as above | Repeat step 5 for that user |
| The wallet rejects the offer, or the QR has expired | Offers are short-lived | Click Issue to Wallet again |
| The marketplace rejects the login | The registration is not approved yet, or the user does not have the role REPRESENTATIVE |
Check the status in the portal and the group of the user (step 4) |